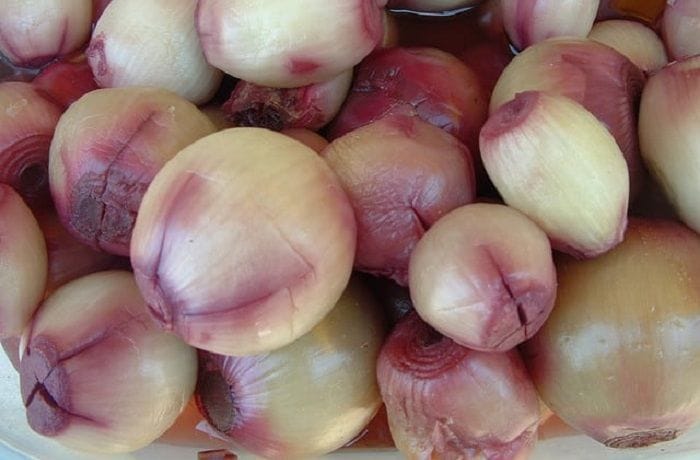
Pickled onions are an economical and easy-to-make appetizer, also somewhat “addictive,” to enjoy on their own, with homemade bread, in salads, or crowning hearty main dishes like Chilean charquicán or porotos con riendas.
How to Make Chilean Pickled Onions?
Whether enjoyed alone or as a side, when it comes to pickled onions, imagination is the limit, experimenting with various varieties or vinegars.
Nutritional Information
Category: Appetizers
Cuisine: Chilean
Calories: 200
Preparation: 7 days
Cooking: 10 minutes
Servings: 8 people
Each serving of Chilean pickled onions contains approximately 200 calories, 40 g of carbohydrates, 0 g of fats, 2 g of proteins, 4 g of fiber, 20 g of sugars, 0 mg of cholesterol, and 680 mg of sodium.
Homemade Pickled Onions Recipe
Ingredients
- 2 kg small onions or pearl onions
- 1 liter red wine vinegar
- 1 liter boiled purified water
- 2 cloves of garlic
- 2 bay leaves (optional)
- 2 green chili peppers (optional)
- Whole black pepper
- Coarse salt

Instructions
- Sterilize the jars by boiling them for 20 minutes in a pot with boiled water or for 10 minutes in a pressure cooker.
- Peel and wash the onions, and make a cross-cut at the top of each one with a depth not exceeding half of its diameter, ensuring they don’t fall apart.
- Distribute the little onions into 2 clean and sterilized glass jars, interspersing a bay leaf and a chili pepper in each one (optional), along with peppercorns and coarse salt.
- Gently fill half of each jar with boiling water and the other half with red wine vinegar. Seal the jars. Optionally, you can fill them only with vinegar, but the flavor will be much more intense.
- Let the jars sit for at least 7 days, preferably for 15 days in a cool, dry, and preferably dark place until they have absorbed the vinegar well.
- When ready, serve the pickled onions chopped or whole, optionally adding a drizzle of olive oil and salt to taste. Refrigerate once opened for up to 2 months.
Additional Tips
Sterilizing the Jars
Proper sterilization is critical for safe preservation. Boil jars and lids for 20 minutes or use a pressure cooker for 10 minutes. Fill jars while they are still hot and seal immediately after adding the brine. Never use cracked or chipped jars — bacteria can survive in small imperfections and compromise the preservation.
Choosing the Right Onions
Small pearl onions or baby onions no larger than 3–4 cm in diameter give the best results — their compact structure holds up to the pickling process without becoming mushy. If only larger onions are available, cut them into quarters. Choose firm, blemish-free onions for the longest shelf life.
Adjusting the Brine
The classic 50/50 ratio of vinegar to water gives a balanced tang. For a stronger pickle, use 100% red wine vinegar. For a milder result, use white wine vinegar and reduce the salt slightly. Add a teaspoon of sugar to the brine for a sweet-and-sour version that pairs particularly well with grilled meats.
| Ingredient | Substitute | Notes |
|---|---|---|
| Red wine vinegar | White wine vinegar | Milder flavor, less color |
| Pearl onions | Shallots | More delicate, sweeter flavor |
| Bay leaves | Fresh thyme or oregano | Changes the aromatic profile |
| Black pepper | Mixed peppercorns | More complex heat |
Frequently Asked Questions (FAQs)
How long do pickled onions last after opening?
Once opened, store the jar in the refrigerator and consume within 2 months. Always use a clean utensil to remove onions — introducing contaminants shortens the shelf life significantly. If the brine becomes cloudy or the onions develop an off smell, discard them.
Can I reuse the pickling brine?
It is not recommended to reuse the brine for a second batch, as the acidity decreases over time. However, the leftover brine makes an excellent base for salad dressings or marinades for grilled meats.
Why do I need to rest the onions for 7 days before eating?
The resting period allows the vinegar and brine to fully penetrate the onion layers, developing the characteristic tangy, complex flavor. Eating them too early results in a sharp, unbalanced taste. For the best flavor, wait a full 15 days if possible.
Can I use apple cider vinegar instead of red wine vinegar?
Yes. Apple cider vinegar gives a slightly sweeter, fruitier result and is a common substitute. It produces a milder pickle, which some people prefer alongside rich main dishes.
What Is Chilean Pickled Onions?
Chilean pickled onions (cebollas en escabeche) are small whole onions or pearl onions preserved in a brine of red wine vinegar, garlic, bay leaves, and whole peppercorns. Tangy, aromatic, and mildly spicy, they are a classic Chilean condiment served alongside bread, charcuterie, and hearty main dishes. Unlike raw onions, pickling transforms the texture into something firm yet tender, with a complex flavor that deepens over the 7–15 days of resting time. Onions are naturally rich in fiber and antioxidants — including quercetin, a natural compound that helps combat oxidative stress — and are low in calories and fats.
History of Pickled Onions in Chile
The word “pickling” originates from the Arabic-Persian “sikbâg” — a stew with vinegar and herbs mentioned in “One Thousand and One Nights” — introduced to Spain by the Moors and brought to Chile during the Spanish colonial period. The technique became widespread in Chilean rural households during the 18th and 19th centuries as a way to preserve seasonal vegetables year-round without refrigeration. Pearl onions were among the most pickled vegetables due to their compact size, firm structure, and natural sweetness that balances well against the acidity of vinegar. Today, pickled onions are a staple condiment in Chilean pantries, produced both artisanally at home and commercially throughout the country.

Did You Know?
Today, pickling is understood as a method of food preservation in vinegar, essentially a marinade that usually incorporates pepper, bay leaves, and garlic.